A Virtual Study Space for Productive Work
I was inspired to create a Notion template that mimicked a virtual study space after researching and writing about online study websites and virtual work spaces. I’ve previously written about LifeAt, Bindr, Fiveable, Study Together, and StudyStream. These sites aim to provide aesthetic and functional online work and study spaces and are increasingly popular.
Notion is also gaining traction from diverse audiences, including students, freelancers, and small to large-sized teams. Notion is considered an all-in-one workspace and many people do their work within the app. I’ve written previously about the Notion templates that students may find useful.
The Notion Study Lounge
I worked with Notion template creators at Hypen to develop the Notion Study Lounge, a virtual Notion template for productive work. The template offers many different features and is customizable. The workspace includes:
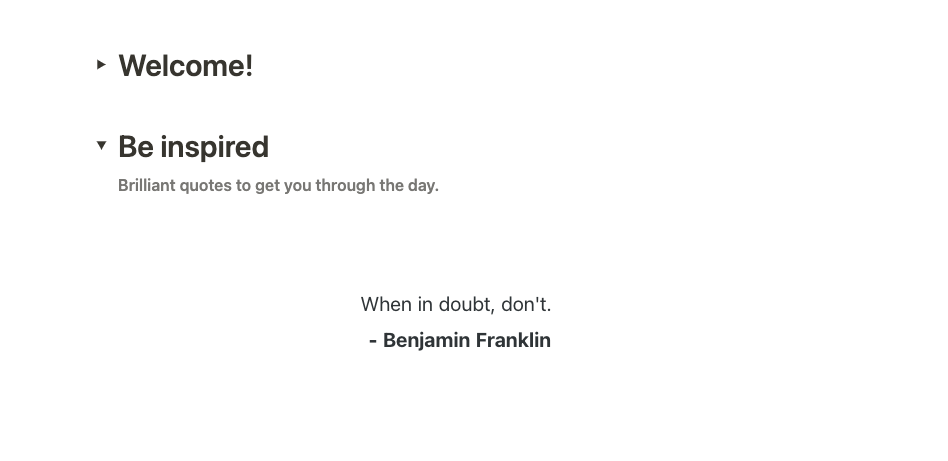
- Inspiring daily quotes
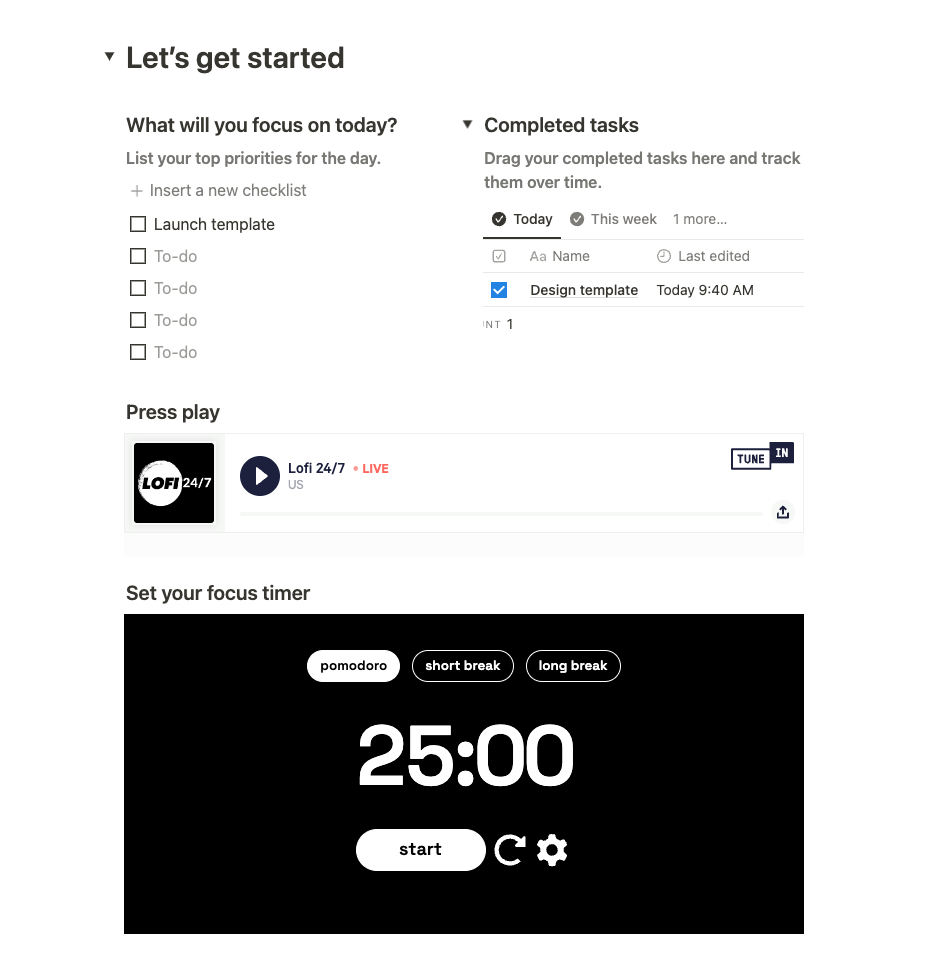
- An editable pomodoro timer
- 24/7 lofi radio station
- A task list
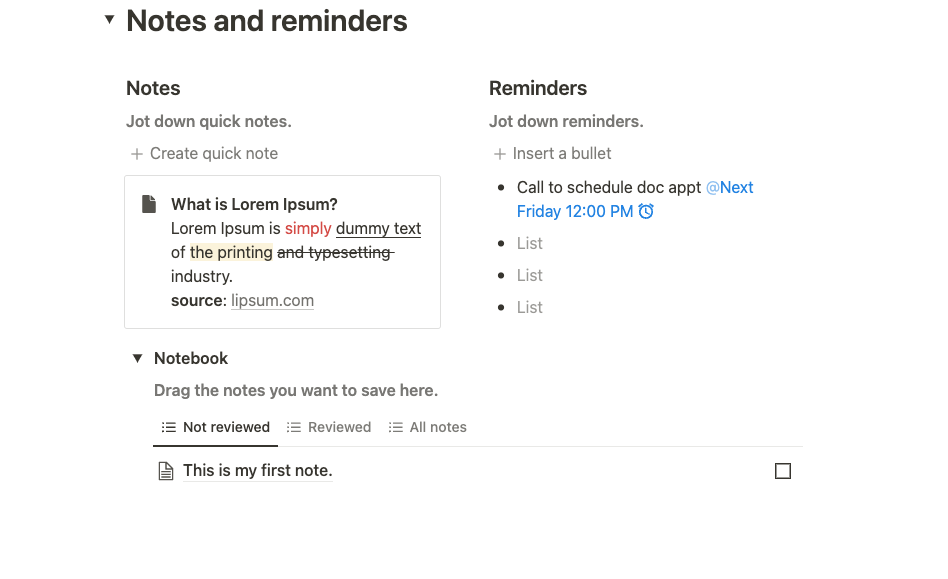
- A reminders section
- A notebook for quick notes
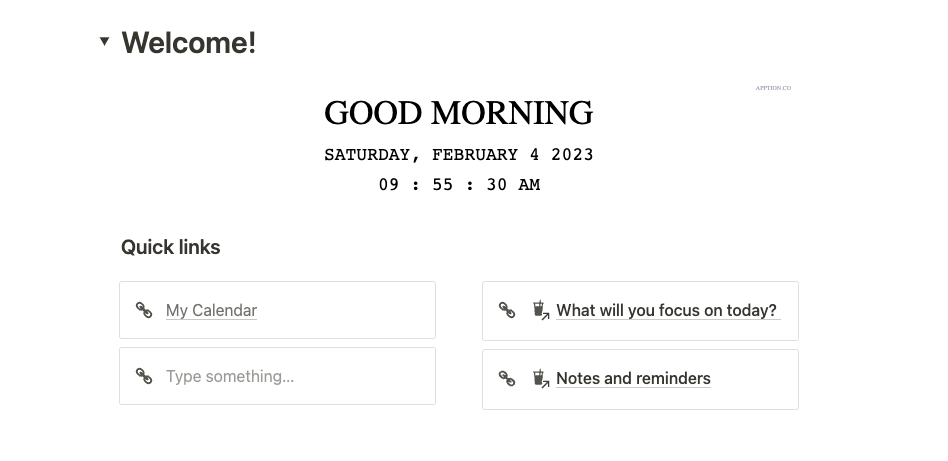
- Quick links
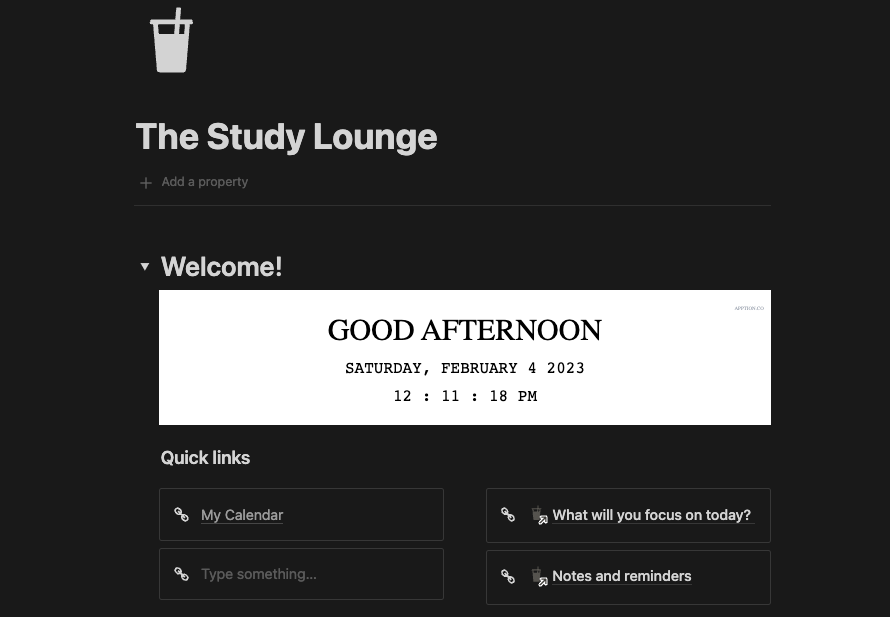
When you log in, you will get a greeting with the current date and time. You’ll also be able to add external and internal quick links.
The internal workspace links will allow you to jump from one section of your work space to another.
We included toggles so that your workspace remains uncluttered.
This is great if you are easily distracted. With one click you can hide other areas.
The workspace can also work as a daily productivity dashboard. It includes a table where you can drag and drop your task lists. You’ll then be able to sort, group, search, and track your tasks over time.
This template also includes a customizable timer and a 24/7 Lofi station — we absolutely love these two features!
You will likely need to jot down some quick notes and reminders. We have a section for that too.
We wanted to create something that would also look good in dark mode, with different fonts, and in full width. This template achieves all of that!
Get the template ($10.00 USD) here and reach out if you have questions about the template or ideas about future ones. The template includes our credits section–we give credit to the creators that make the widgets we use possible.
Buy onMention mystudenthq when purchasing here to get 10% off.
If you are looking to try Notion, you can use my affiliate link for a Notion Plus account.
You may be interested in these posts…
- 10+ Reasons Reflect Notes Should Be Your Primary Note-Taking App
- A Virtual Study Space for Productive Work
- 5+ reasons to use Sunsama to organize your day
- Growth and fixed mindsets and working toward long-term goals
- Why completing a PhD program is more about grit than anything else


